This fall I had a brain wave after I was once again disgruntled by the ickiness of a cheap granola bar, contents: oats, corn syrup, preservatives. If it is just you going hiking, you can go buy all the Clif Bars you want, but for a family of seven, this would be about the price of crowd-sized beef roast, and that isn’t how we roll around here. We love homemade granola bars, but I was wanting something not sticky, more in the line of a power bar with lots of protein. I needed it to be portable when we do outdoor sports. I needed it to be reasonably affordable. I needed it to be easy, because otherwise it wasn’t going to happen.
My idea was to combine homemade energy bites with a granola bar recipe. We loved them, but they were too crumbly to be practical except straight out of the freezer. Then the brain wave hit… why not get some quality dark chocolate and coat them, then wrap them individually, just like power bars? Now we were in business. May I introduce you to Hiker Bars on a Budget, our not so top secret recipe that we made up all by ourselves. 🙂
Combine in a saucepan and stir together over low heat until melted:
½ cup peanut butter
⅓ cup coconut oil
⅓ cup honey
Stir into this mixture:
1 cup rolled oats (we toasted them for 10 minutes, then chopped them up in a food mill)
1 cup unsweetened shredded coconut
1 scoop protein powder, vanilla flavored
2 Tb. chia seeds or flax seeds/meal (You could use more. Some of my people think seeds annoy their teeth so I go light on them.)
½ cup of any combination of chopped nuts, sunflower seeds, dried fruits, etc. Here is where I go with chopped walnuts.
a dash of sea salt and a splash of vanilla
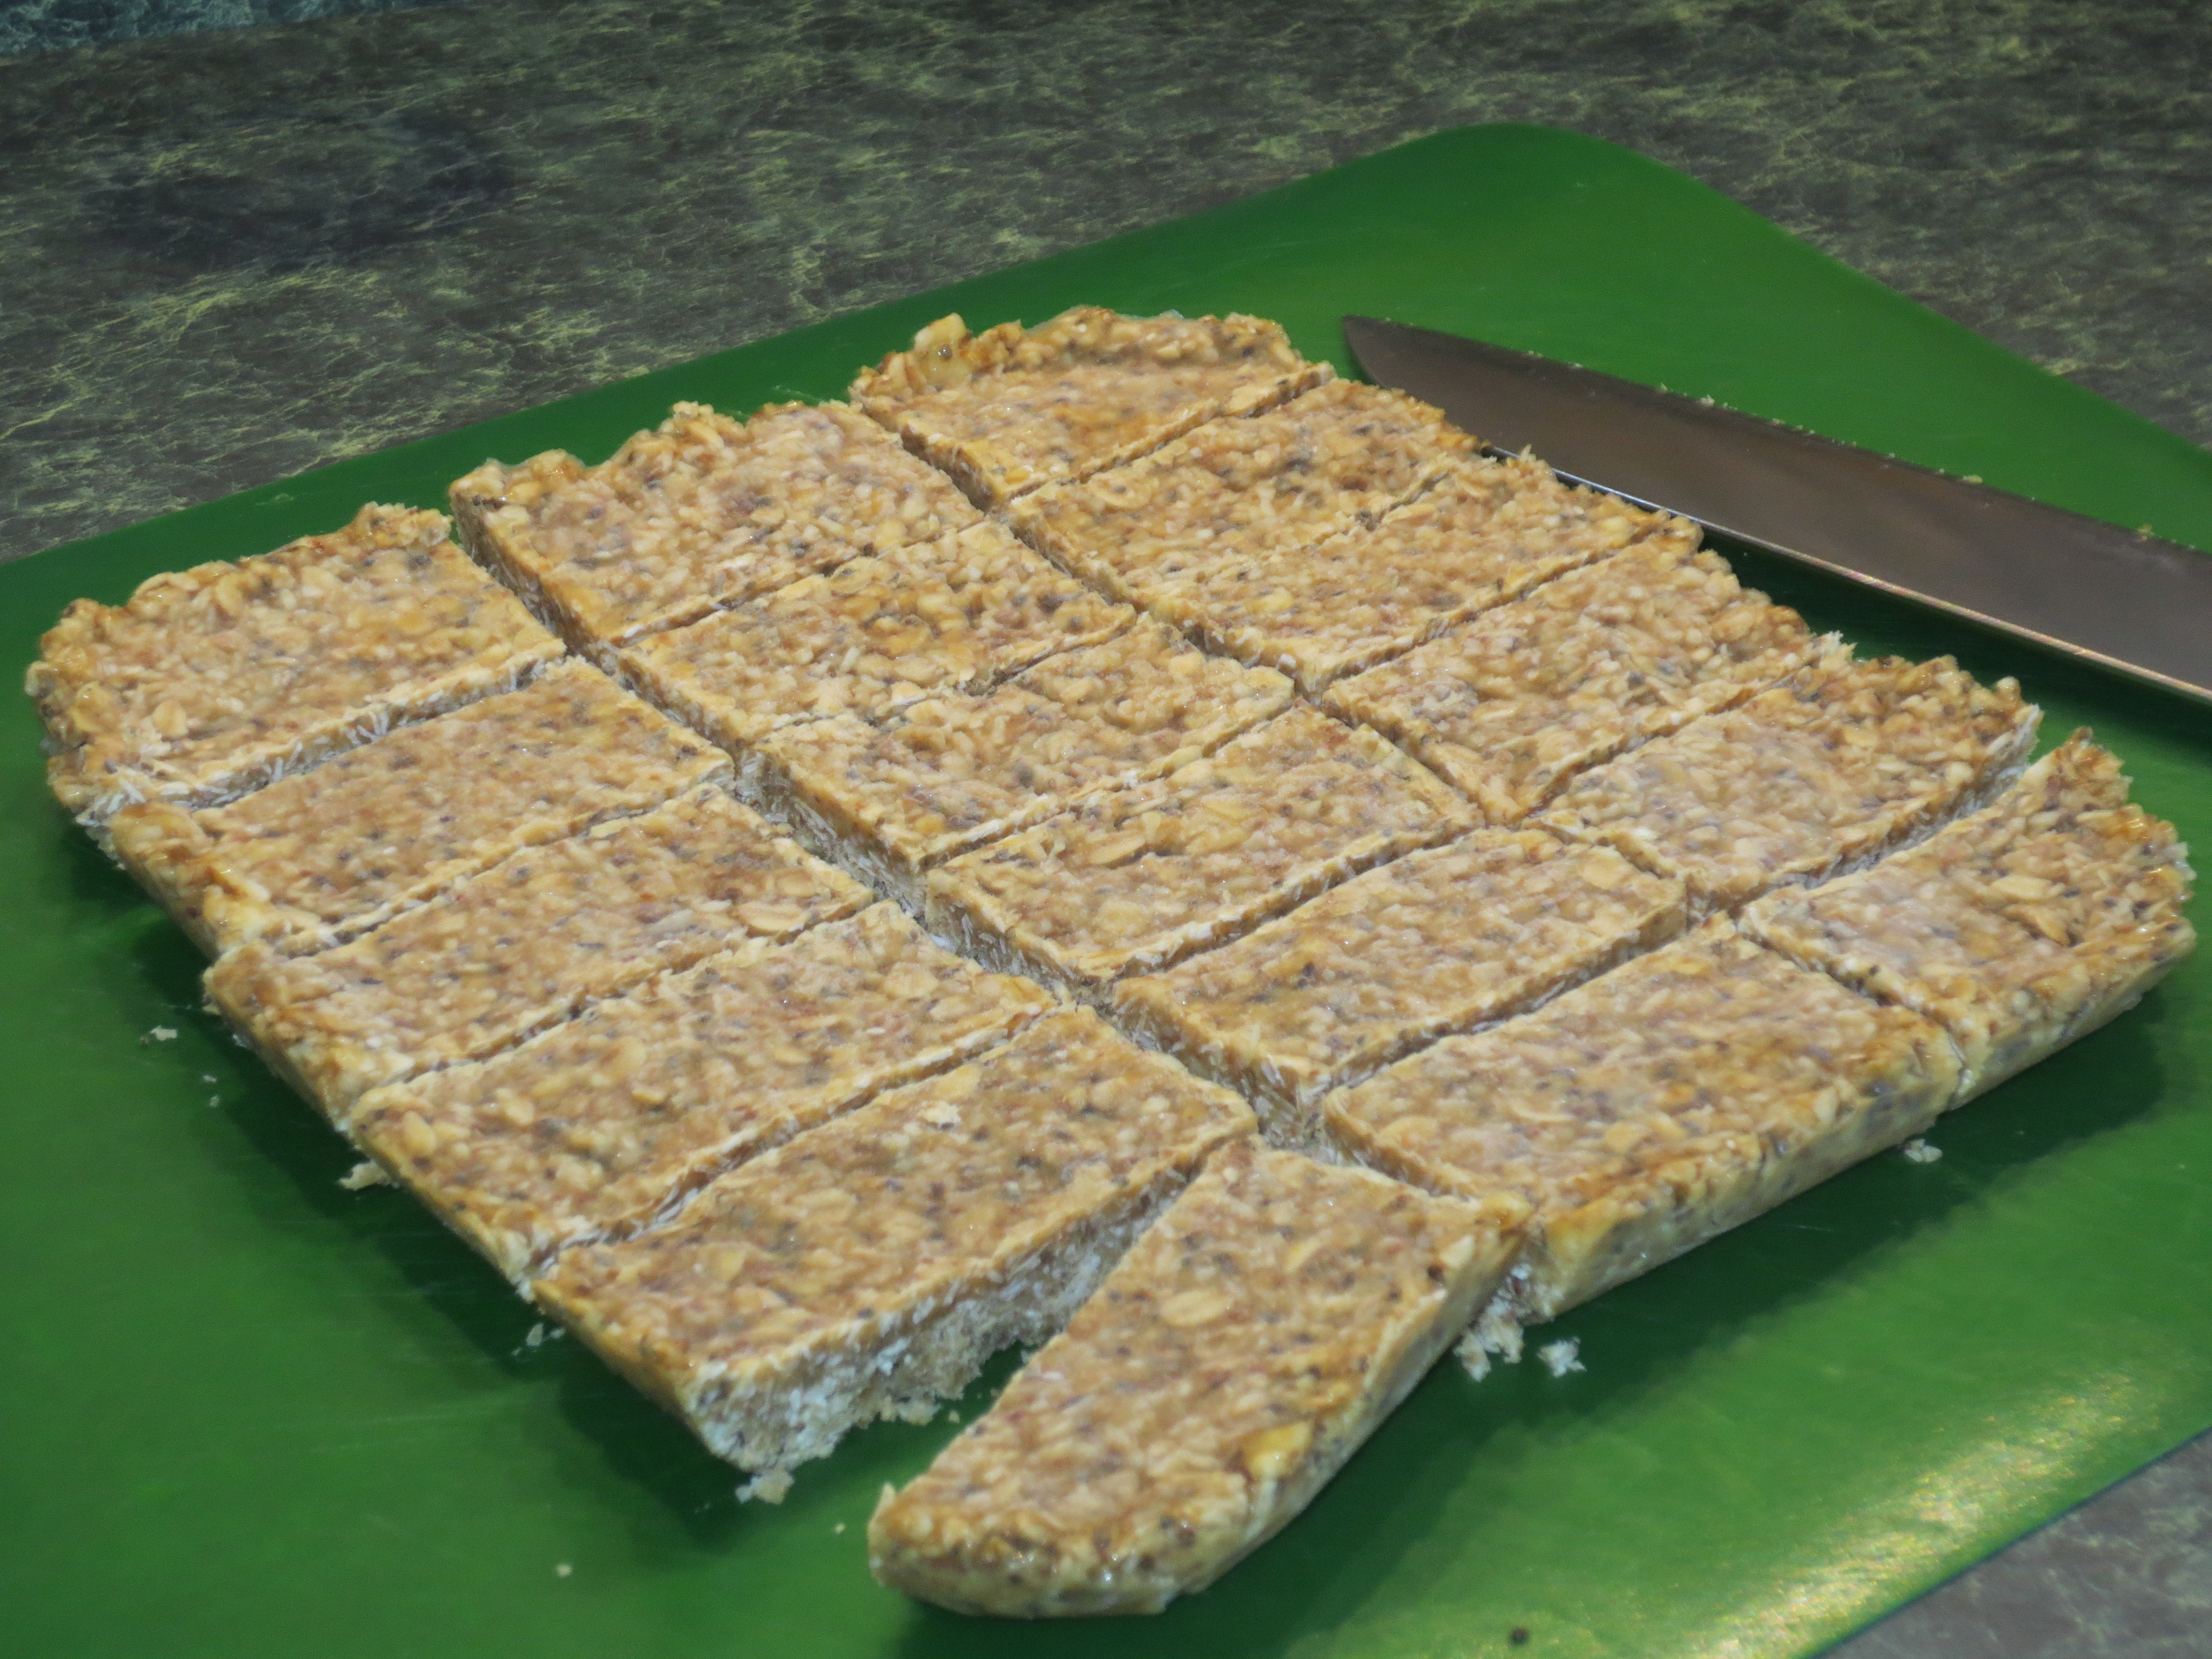
Line an 8×8 pan with parchment paper then press the mixture into the pan with a spatula. Pop it into the freezer for about an hour so that it sets firmly enough to lift out of the pan. Cut into desired size with a sharp knife. I make 18 bars out of one pan.
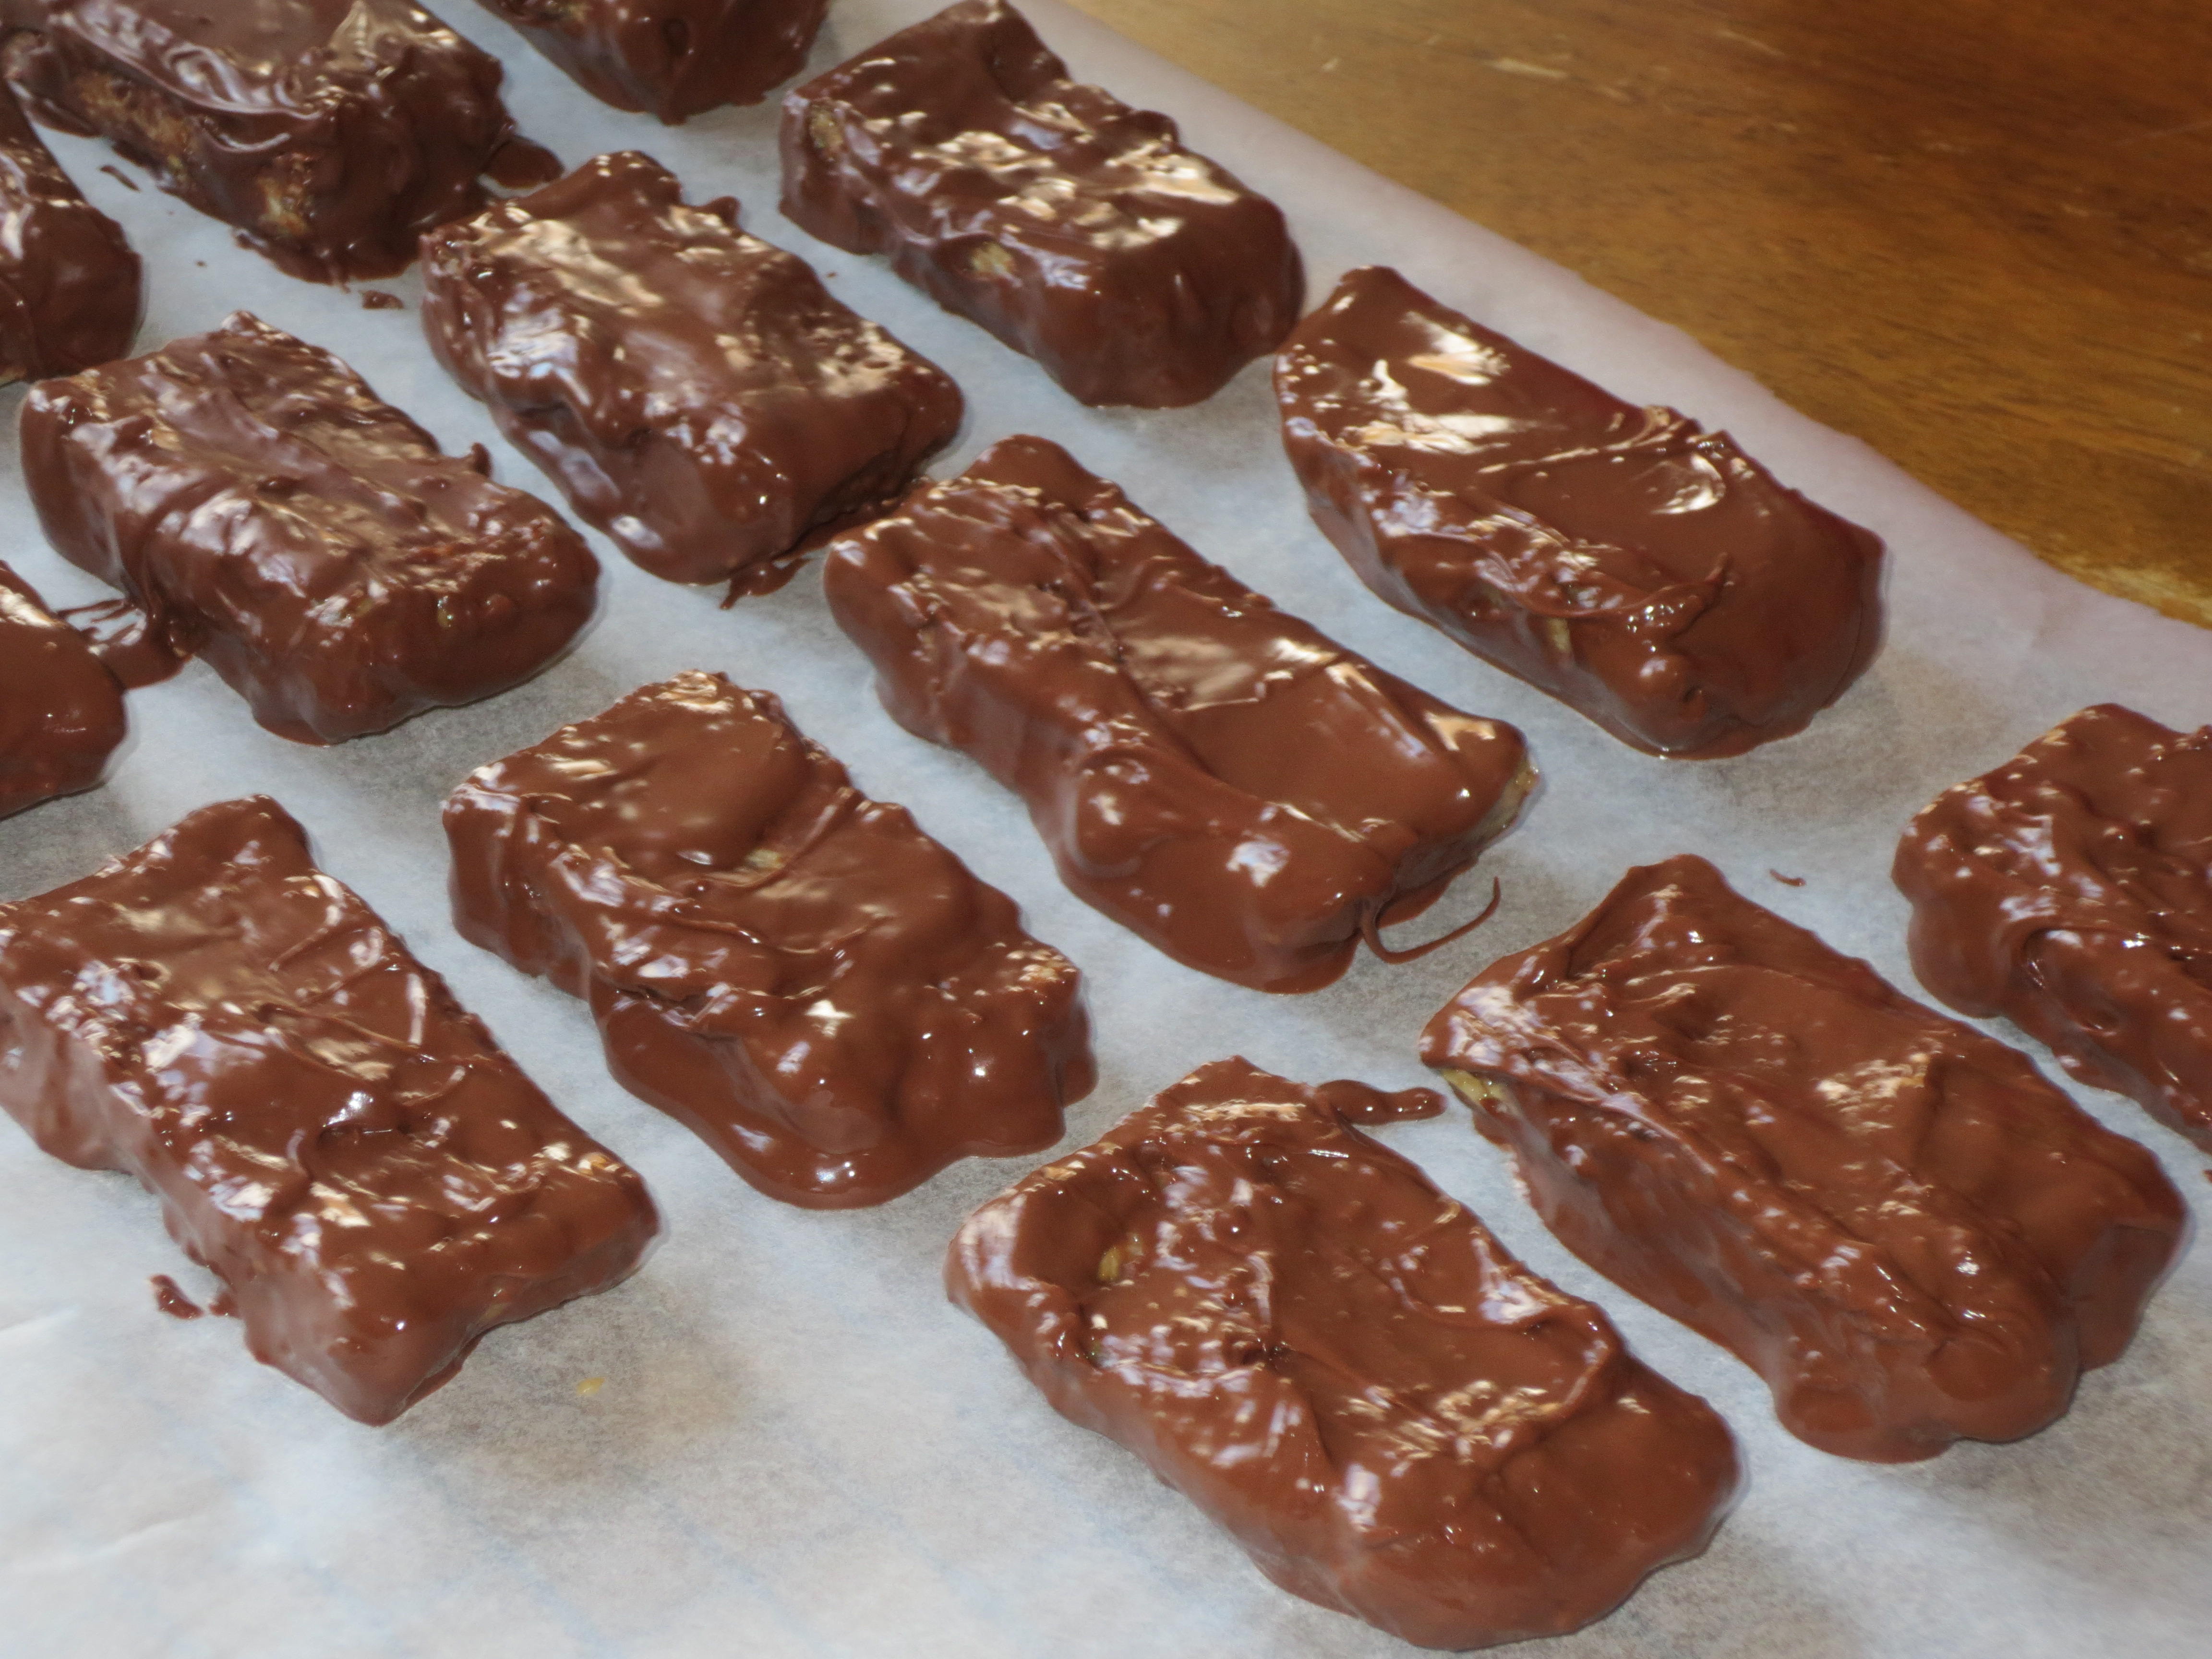
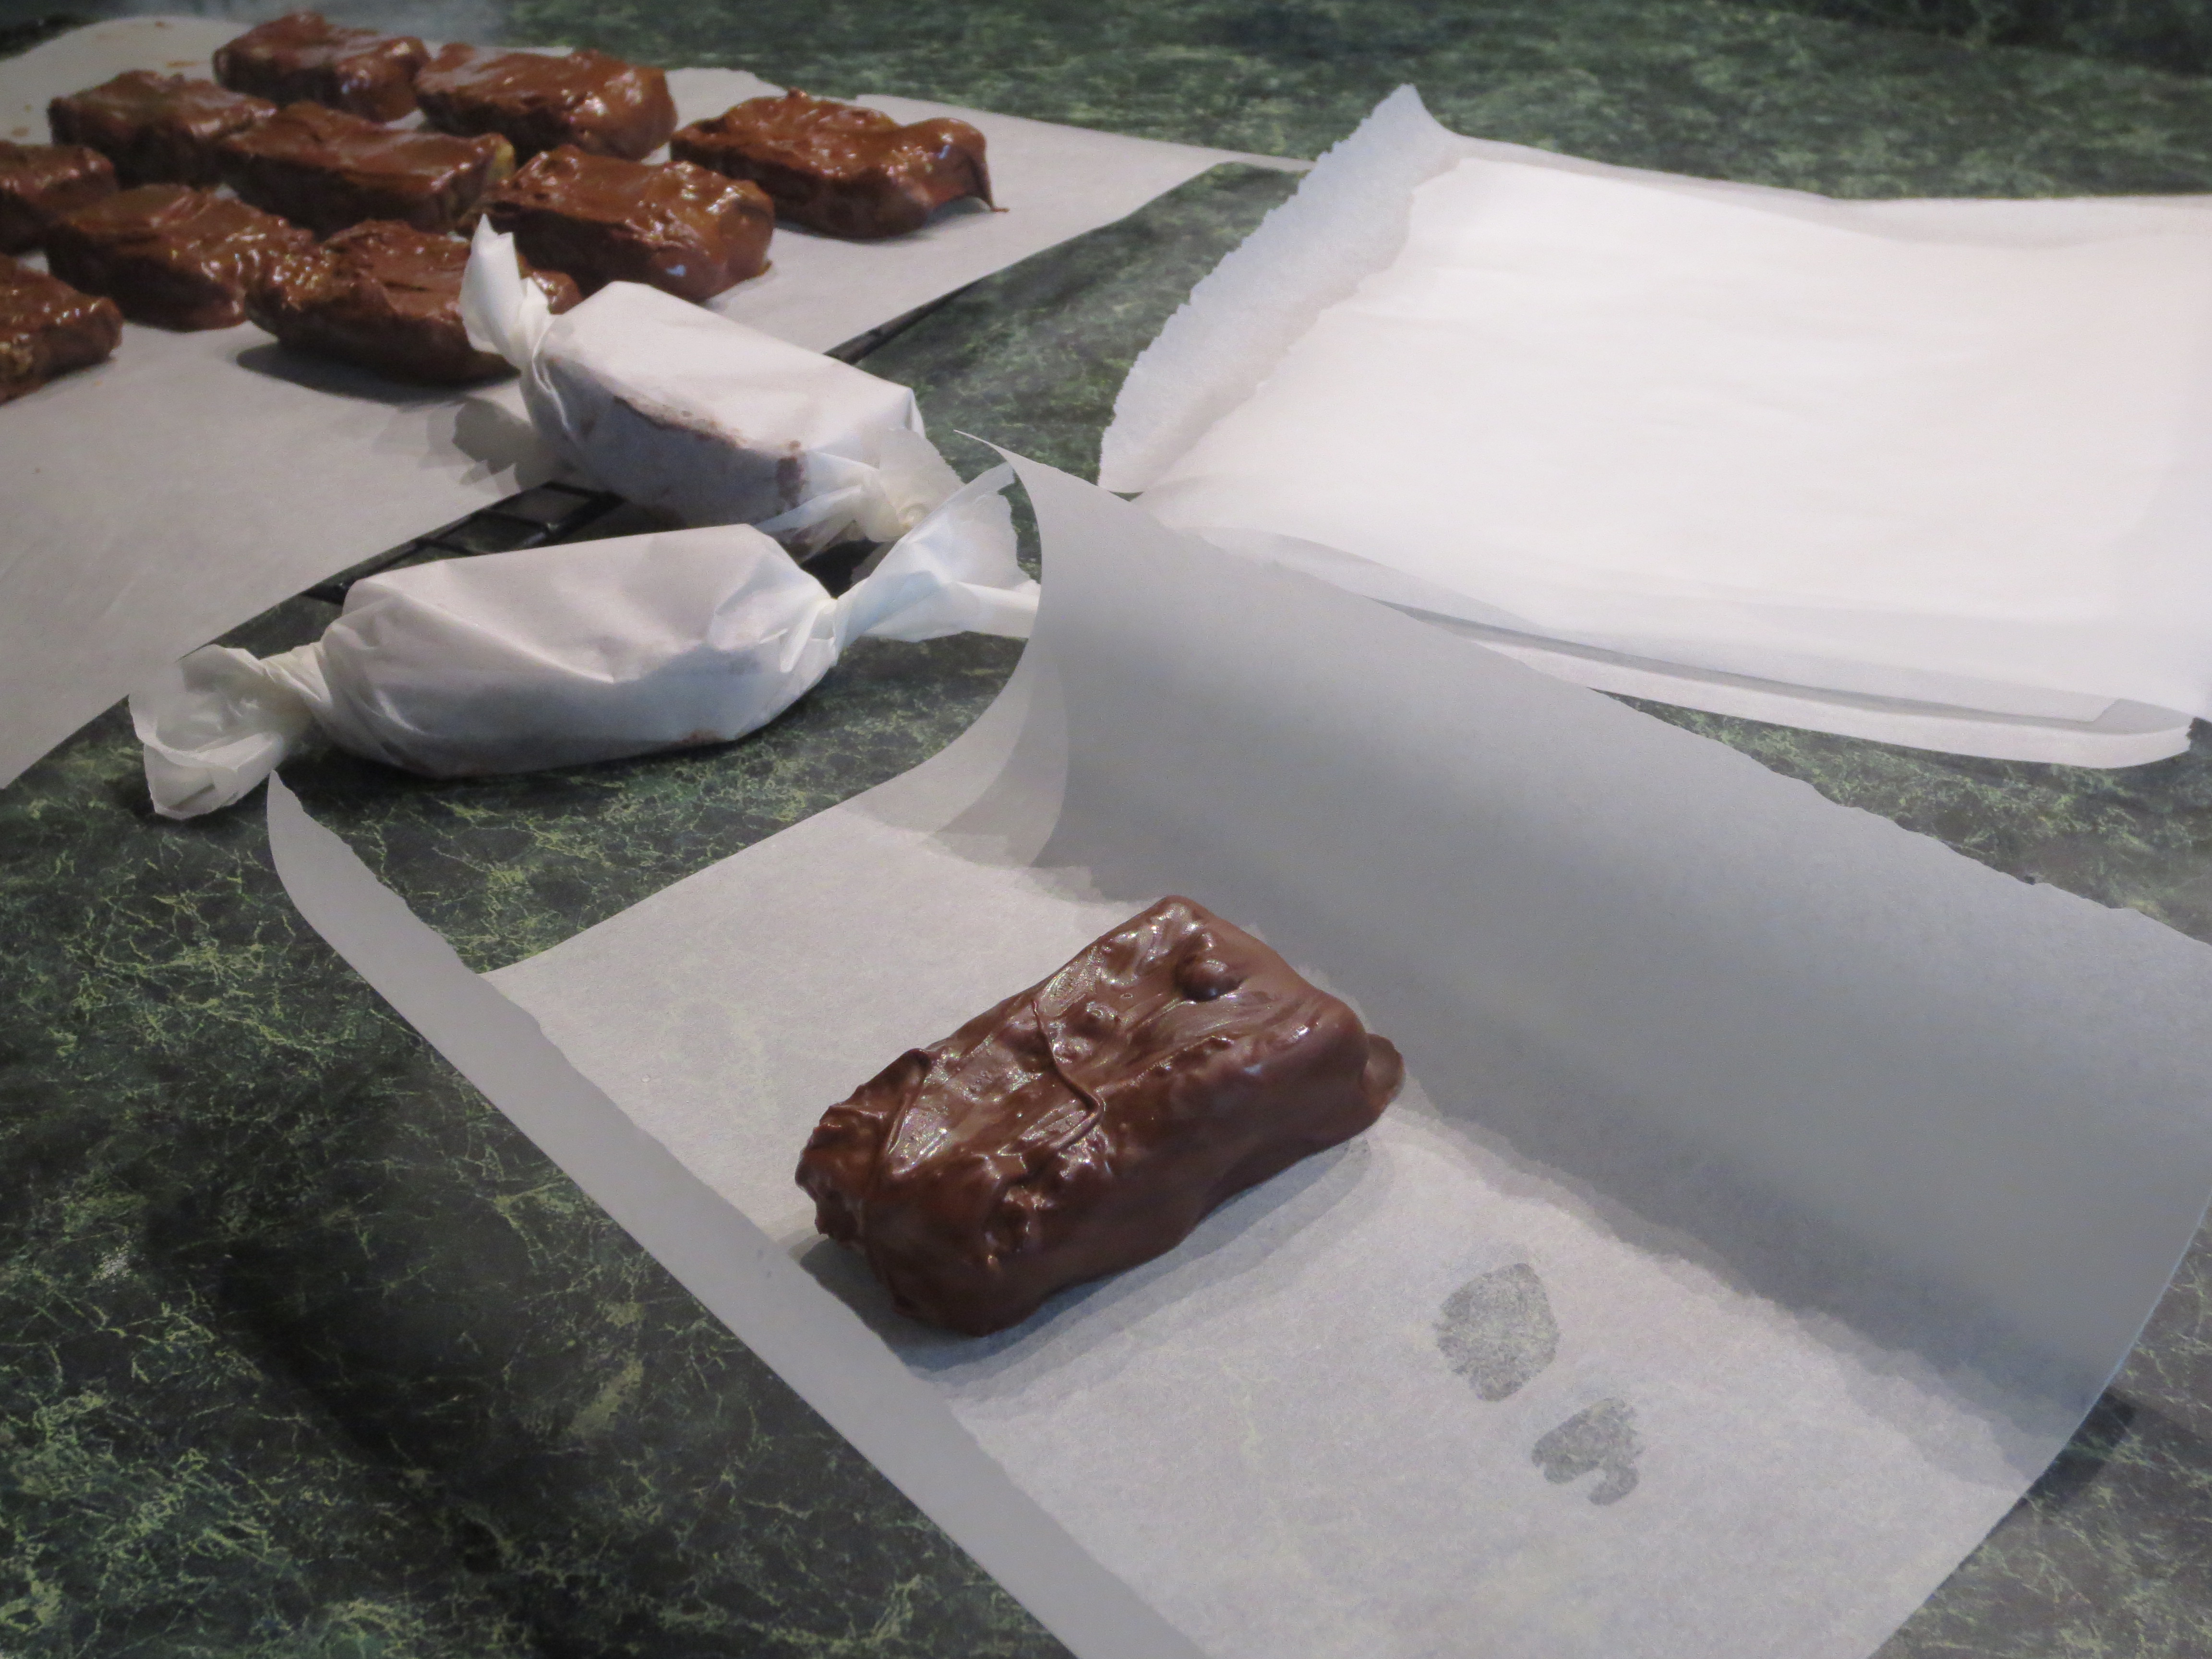
Use a double boiler to melt dark chocolate coating wafers (an 11 oz bag is ample, but you can stretch your chocolate with food grade paraffin that will also make the chocolate dry harder) then dip the pieces in it to cover the bar all around. (Keep them frozen until you are ready for this step, or you will have them disintegrating in the molten chocolate, which is not the worst thing that could happen, but just not what you are wishing for at the moment.) You don’t need more than a thin layer to hold it all together, but when you are expending a lot of energy and starving, nobody cares about 50 extra calories. Honesty compels me to say that these photos are milk chocolate and it was thicker than necessary. (Yum.) But the dark is the best.
Once the chocolate has hardened, wrap the individual pieces in parchment paper and store them in the freezer or they will definitely be all scarfed up long before the hike you are planning.
This is not a low calorie food. For that you need celery, or you could just step off the trail and find some birch twigs to chew. According to Calorie Count, there are about 164 calories in one bar without the chocolate. They are small bars, which was the point. They don’t take up much room and they are nutrient dense. This is a power food, easily made, stored and transported in a backpack. These bars will cause the frisbee to fly higher and the bikes to pedal easier, but should not be given to children in low-key-let’s-all-just-play-go-fish-while-we-wait situations.
I have tried these with a number of variations. Gabe and Alex don’t like the sun butter ones. Once I tried sucanat to sweeten them because I was out of honey, but it was too dry and I ended up adding more goopy stuff. Gregory and I agree that any granola-ish stuff held together with nut butter and wrapped in chocolate is fine, just fine.
By my calculations, I can make a batch for less than 5 dollars. Of course, there is the time factor, but I have lots of that. 😉
Try them and tell me what you think. Better yet, add some original ingredients and tell us about them.

Yum! Nutrient dense sounds good to me. We too have entered that blessed state of being where cliff bars, although marvelously easy to hand out, simply cost far more then can be reconciled with. I look forward to trying this recipe.
yum… i’m gonna try these today! they look and sound fabulous!
I was with Rhoda this weekend, she spent awhile enjoying your blog. 🙂
And they really are fabulous! Definitely a keeper and I love that it’s all ingredients I usually keep on hand! Thanks for sharing your brilliance! 🙂 PS I won’t say how many I ate.. I’ll try not to eat that many ever again!
Ah, thanks for the endorsement. I know exactly what you mean. I usually try them before the chocolate, to make sure they are turning out ok. Then after I have them covered, it’s a worse temptation..:)
How neat! I would like to try your recipe. These look delicious and nutritious.
I finally got around to making these. I was out of coconut flakes, so I just used more whole oats. I also just added chocolate chips on top instead of dipping them. Good stuff! 🙂