The title is misleading, since anyone who has ever grown peas knows there is nothing that easy about either growing or processing them. If you have planted a substantial amount of them, and you have picked the rows, you stand up with a genuine case of pea-picker’s back and make your annual vow not to do this again. Ever. But you said it last year too. What is it that brings us back for more punishment every year?
It’s the flavor, the sweet, bursting orbs of brilliant green that you simply cannot get any other way than by putting in the work yourself. Well, if you happen to live near Amish country, you might be able to buy a few bushels that someone else raised and picked. If this is the case, you should never ever make them feel bad for the price they are asking. But I digress.
The easy peasy processing that I grew up with is a mystery to many of my friends. Since I love you all, I will share with you a detailed step-by-step to help you out. Of course, there may not be anyone else out there that wants to improve on the pea experience, but on the odd chance, I will give it a shot.
You start with the pods you just picked, obviously. After you have rubbed your back and had your tardy cup of coffee and sustained yourself with a little something, of course. (disclaimer: many unedited cell phone pics coming up)

That black holey kettle is a steamer basket, which you fill to the top of the holes with peas. Hopefully you have a responsible big boy who started the steamer kettle boiling a half hour ago so that you do not have to wait for it. But if not, you can have another cup of coffee.
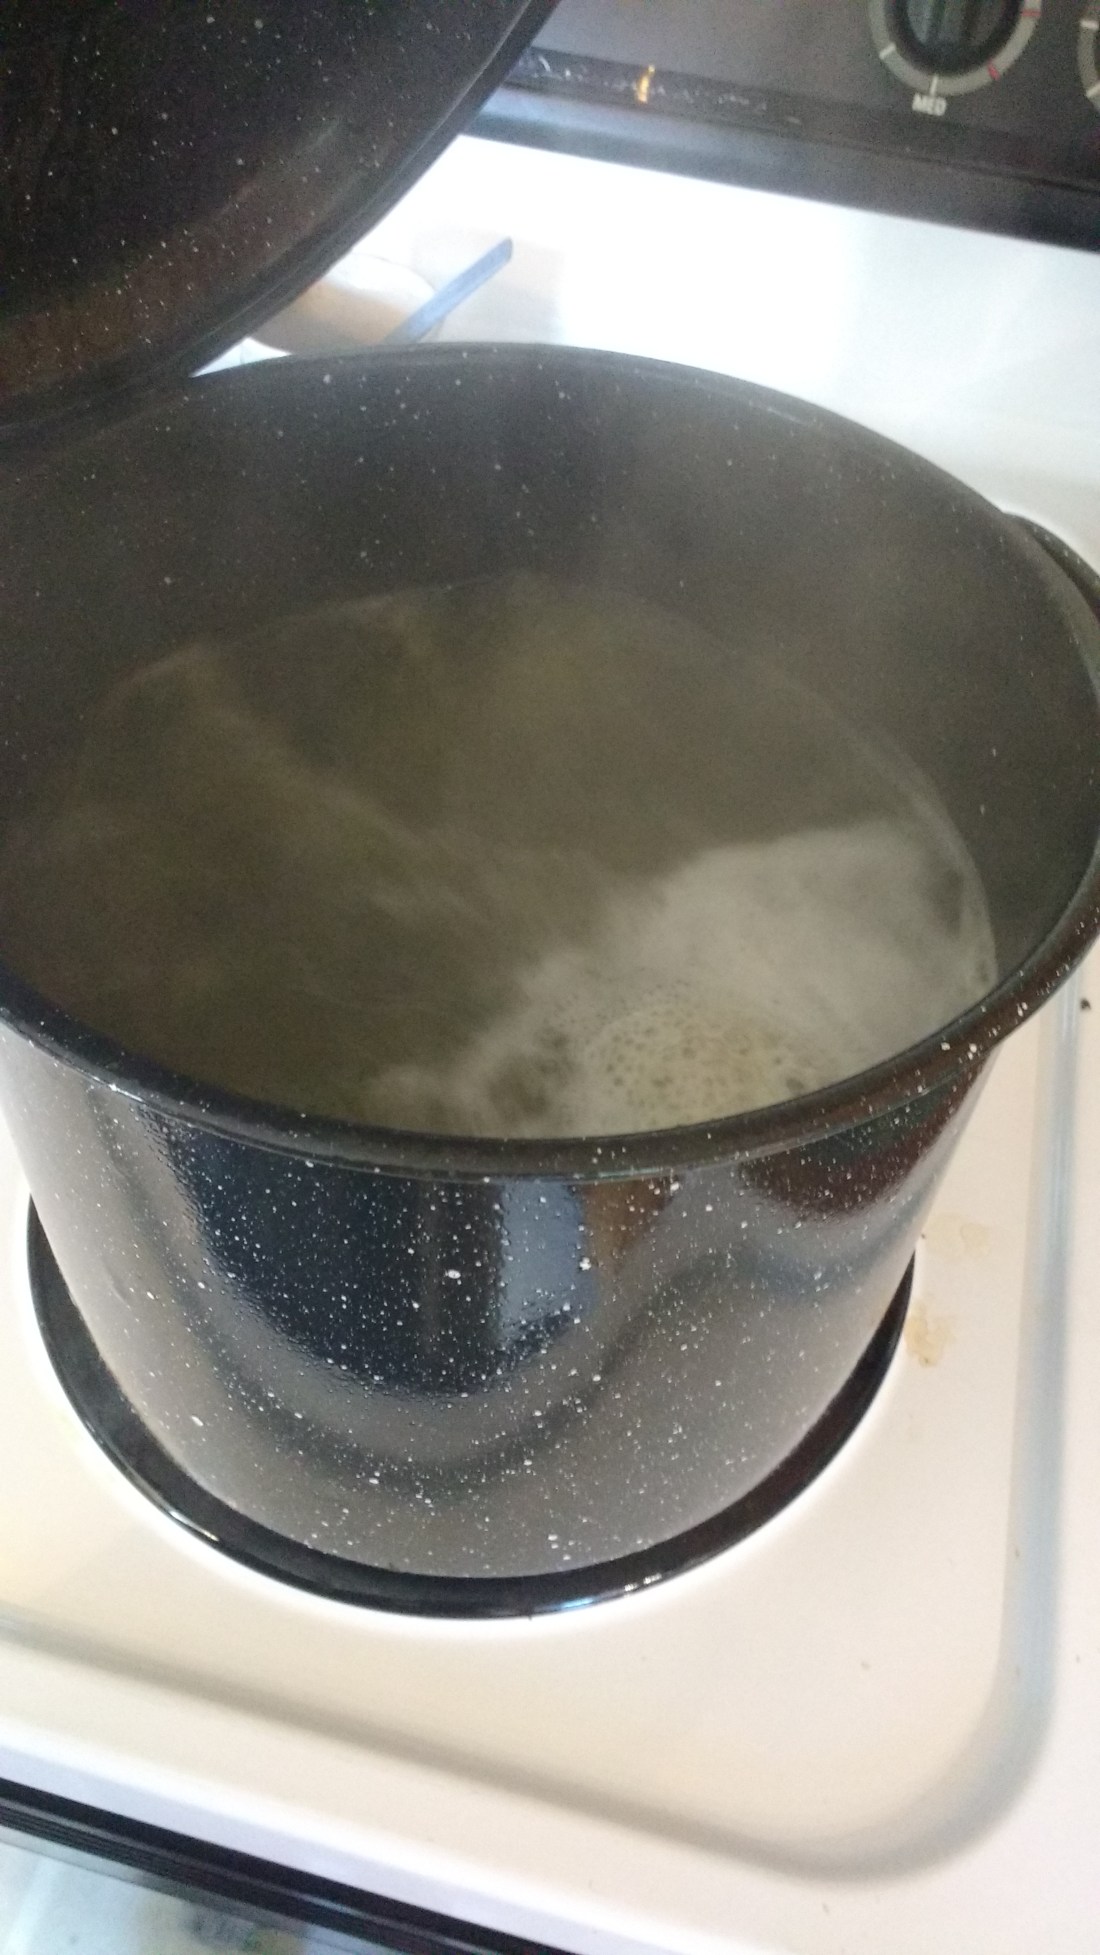
When the water rolls like that, you are ready to gently lower the steamer basket into it. Don’t plop it in or you will have overflow and a stained stovetop to contend with when you are done. And yes, this water has blanched a few batches already, hence that interesting browny-green color. But you use the same water for the whole batch, only topping it off with some fresh water when it boils low.
Set your timer for exactly four minutes. At two minutes you select a long-handled spoon and give the pods a stir. If you don’t do this, the bottom ones in the basket will hog all the hot water and the top ones won’t blanch properly.
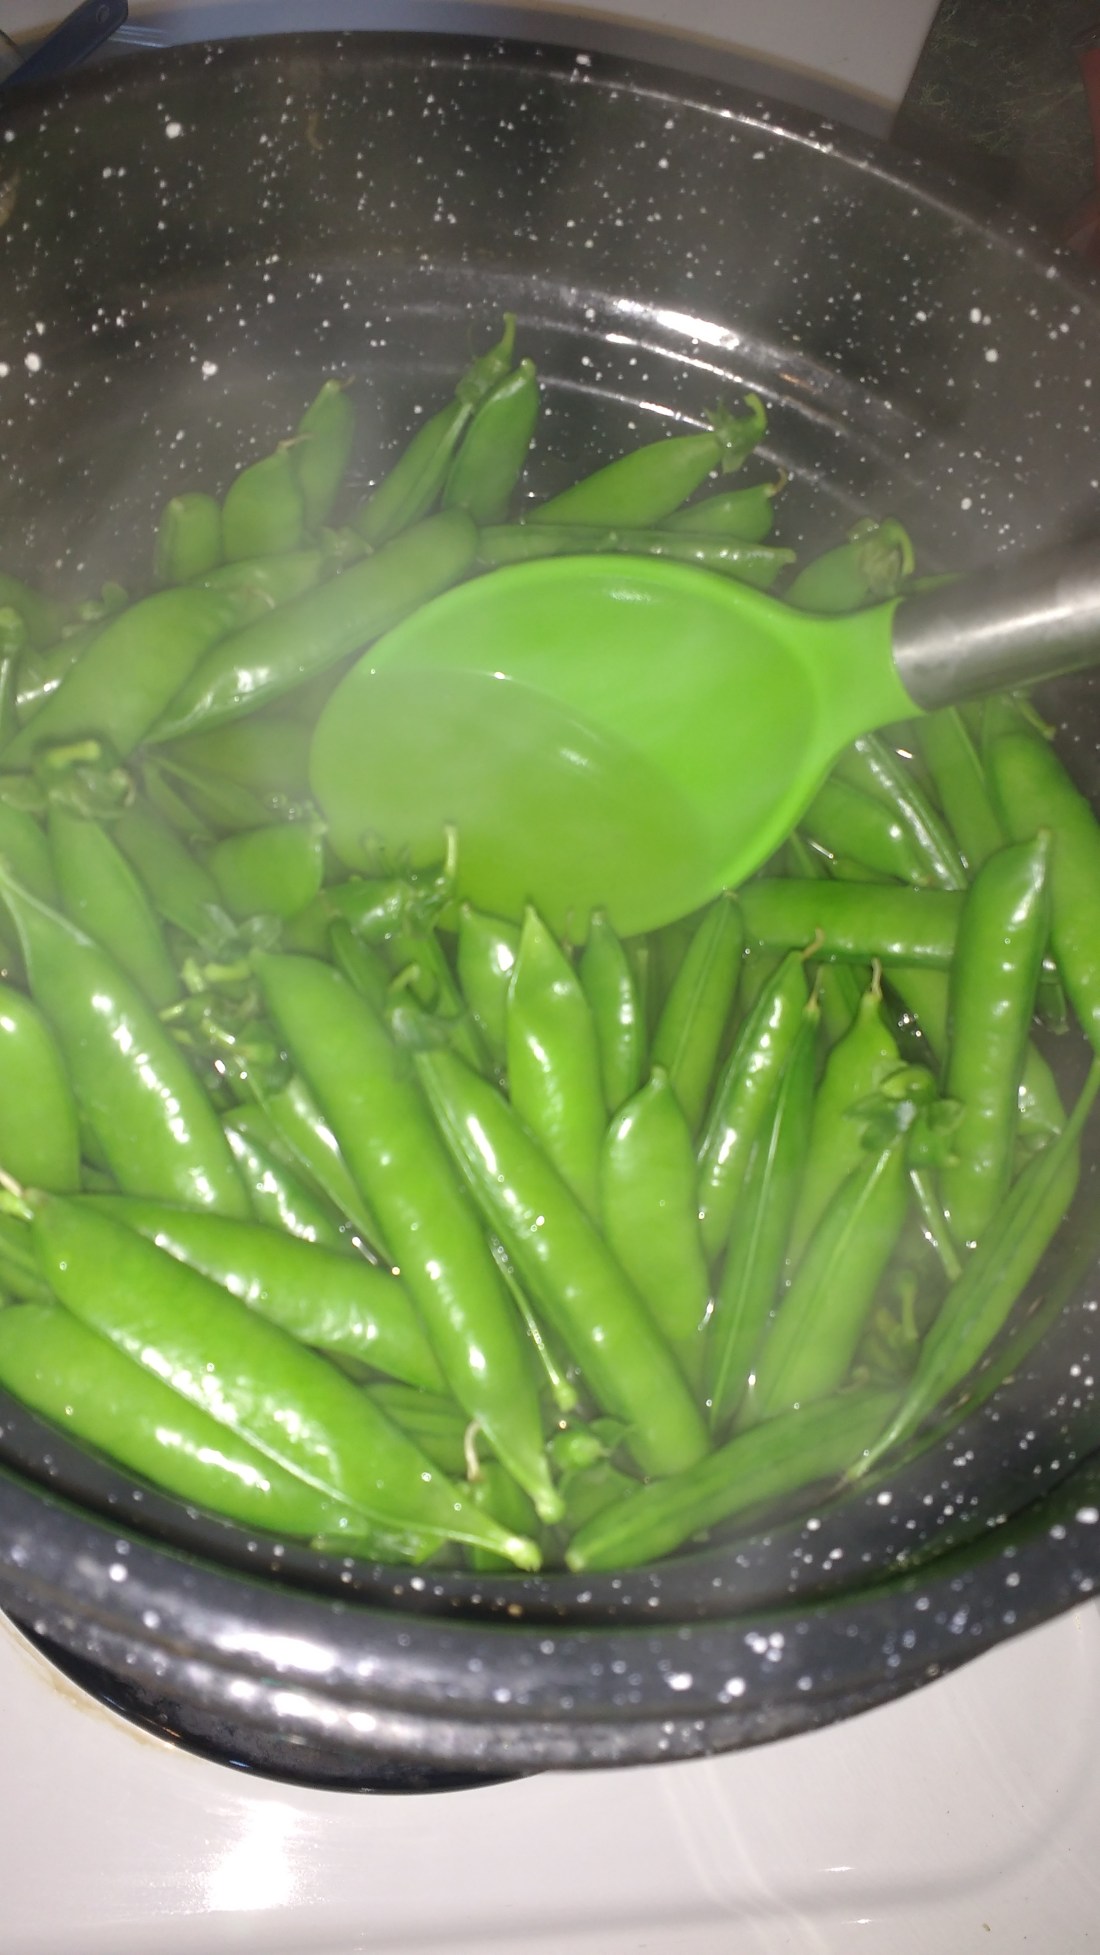
Bonus points if your spoon matches exactly.
When the timer goes off, slowly lift out the steamer and dump the blanched pods into a cold water bath to shock them into submission. I mean, so they stop cooking and don’t get squishy. Once they are cooled down, (and depending on how cold your water is, you may need to drain and repeat) drain off the water and start shelling.
Now I have no quarrel with traditional shelling, but what I don’t like is this: 
See that vast countertop? But what I want to show you is the blossom ends on the pods. When you shell them dry, they fall into the shelled peas and you get to pick and pick and pick and wash and wash and sort and sort them out. And then you still have to blanch the peas and cool them before you put them into the freezer. If you blanch the whole pod, they float off into either the boiling water or the cooling water. You eliminate that whole fussy step of cleaning the peas. And you don’t have to blanch them. They are ready to go once popped out of the pods.
I do mean popped out. There are several methods. I prefer a twist, which my son and I had fun trying to catch on camera. It sort of looks like you take a pod by either end and twist it into an S.

It’s a law of science: you apply pressure and something has to give. Only it takes just a teeny amount of pressure, since the pods are pliable. Here is a tip: you want to make sure the thinner edge of the pod is pointing down into your bowl, unless you want a faceful.
Children find it easier to just slide their fingers along the pod and strip all the peas out the end. It’s really fun!

You will want to have a good audiobook that engages the attention of all while you do the shelling. We like Winnie the Pooh, narrated so incredibly well by Peter Dennis. “Once upon a time, a long, long time ago, about last Friday…”
The last step is to corral a charming little girl whose mother did not comb her hair before the operation began, tie an enormous kerchief around the wispy curls, and give her a measuring cup to fill your freezer containers.

I am quite certain that this step-by-step will not convince anyone that peas are actually easy-peasy. But for those who already raise them, give it a shot. I am guessing you will thank me. 🙂
Happy Saturday!

Yes!! This is THE way to process and shell peas. No more sore fingers either. And a good audio book is a wonderful addition to any job! 🙂
Hmmmm….. As weird as I am, I just love the pop and crack of shelling crisp peas fresh out of the garden.. I never heard of this process, but maybe just maybe it would be worth a try 🙂
Just two days ago I was telling a local friend that we blanched our peas in the pods when I was growing up, and that process was a mystery to her, just as you described in the beginning. I am SO sending her this link… immediately!! What happy timing on this delightful post :).
PS. I am sure my mom would nibble on the irresistible cheeks of your adorable little girls. “Bocku sup”, she calls it. 🙂
Glad to be of service. 🙂
“Bocku sup!”
Oh goodness. I just relearned a Dutch phrase I shall now delight to teach my girlies! 😊☺️
Yes. You described the pleasy peas perfectly…
Winnie the Pooh read by Peter Dennis…yes!! It’s the only way. My little boys love to go to sleep with Peter.
I’m afraid know nothing about growing peas, but this tip is ingenious! If my thumb ever develops a green hue and I plant peas, I will remember this.